Table of contents
Open Table of contents
I. Recommended Background Knowledge
- You are DevOps or Developer
- Familiar with CI
- Known at least 1 CI tool/platform (e.g: Gitlab CI, Jenkins, Github Action, Jenkins, …)
- Familiar with Docker - Containerization
II. Introduction
This is my first technical blog, so it may have some errors here and there, so please create a Suggest Changes If you feel like changing any part of this blog. Really appreciate it!
If you’re a DevOps Engineer, Developer, or even a Tester/QA, you’re likely familiar with CI/CD and may already be using tools like Jenkins, GitLab CI, or GitHub Actions. Have you ever encountered an issue where, after a long run, your CI/CD pipeline randomly throws errors that aren’t directly related to your application? Congratulations, you’ve likely encountered CI inconsistency.
As a DevOps engineer or developer with experience in CI/CD, you probably know that each CI platform has a unique setup. For example:
Disclaimer: This is only my opinions. But I’ve used all of these extensively with a deep understanding.
| CI/CD Name | Format | Personal Opinion |
|---|---|---|
| Gitlab CI | .gitlab-ci.yml (Yaml) | Very Good |
| Tekton CI | K8s manifest (Yaml) | Not rcm if you don’t have indept K8s knowledge and advance skills because this requires a lot of ducktaping to work |
| Github Action | ./github (Yaml) | Good |
| Jenkins | ClickOps/Java-Groovy | For me Jenkins only good initially - fast but not reliable and dependency versioning is like ass - Please stay away from this |
| AWS CodePipeline | buildspec.yaml (Yaml) | OK but for some unique cases you may need to do more tricky stuff |
With each platform having different configurations and syntax, migrating a large system from one CI platform to another can be very challenging. Having worked on numerous CI migration projects, I can say it’s not a simple process. For example:
Imagine a SIMPLE CI process to lint -> build -> push an image with Node.js. Here’s how it might look in Jenkins versus GitLab CI:
Jenkins Example:
pipeline {
    agent any
    environment {
        DOCKER_IMAGE = "${env.REGISTRY_URL}/${env.JOB_NAME}:${env.BUILD_NUMBER}"
    }
    stages {
        stage('Lint') {
            agent {
                docker {
                    image 'node:18'
                    args '-v $HOME/.npm:/root/.npm' // Cache NPM dependencies if needed
                }
            }
            when {
                branch 'main'
                expression { return env.CHANGE_ID != null } // Run on merge requests or main branch
            }
            steps {
                script {
                    sh 'npm install'
                    sh 'npx eslint .'
                }
            }
        }

        stage('Build') {
            agent {
                docker {
                    image 'node:18'
                    args '-v $HOME/.npm:/root/.npm'
                }
            }
            when {
                branch 'main'
                expression { return env.CHANGE_ID != null } // Run on merge requests or main branch
            }
            steps {
                script {
                    sh 'npm install'
                    sh 'npm run build'
                }
            }
            post {
                success {
                    archiveArtifacts artifacts: 'dist/**', allowEmptyArchive: true
                }
            }
        }

        stage('Push Image') {
            agent {
                docker {
                    image 'docker:20.10.7'
                    args '--privileged -v /var/run/docker.sock:/var/run/docker.sock'
                }
            }
            when {
                branch 'main'
            }
            steps {
                script {
                    withCredentials([usernamePassword(credentialsId: 'docker-credentials-id', usernameVariable: 'DOCKER_USERNAME', passwordVariable: 'DOCKER_PASSWORD')]) {
                        sh 'echo "$DOCKER_PASSWORD" | docker login -u "$DOCKER_USERNAME" --password-stdin'
                        sh "docker build -t $DOCKER_IMAGE ."
                        sh "docker push $DOCKER_IMAGE"
                    }
                }
            }
        }
    }
}
Gitlab-CI Example:
stages:
  - lint
  - build
  - push

# Linting Stage: Run ESLint
lint:
  image: node:18 # Use a Node.js Docker image
  stage: lint
  script:
    - npm install # Install dependencies (if ESLint is a dependency)
    - npx eslint . # Run ESLint on the codebase
  only:
    - merge_requests
    - main # Optionally, restrict to certain branches

# Build Stage: Install dependencies and build the app
build:
  image: node:18 # Use a Node.js Docker image
  stage: build
  script:
    - npm install # Install project dependencies
    - npm run build # Run the build script (adjust if you have a custom build script)
  artifacts:
    paths:
      - dist/ # Optionally save build artifacts, like compiled files
    expire_in: 1 hour
  only:
    - merge_requests
    - main # Optionally, restrict to certain branches

# Push Image Stage: Build and push Docker image to registry
push_image:
  image: docker:20.10.7 # Use the Docker image to build and push the image
  stage: push
  services:
    - docker:20.10.7-dind # Enable Docker-in-Docker for building images
  variables:
    DOCKER_DRIVER: overlay2 # Docker storage driver (optional, depending on the CI environment)
  script:
    - echo "$CI_REGISTRY_PASSWORD" | docker login -u "$CI_REGISTRY_USER"
      --password-stdin $CI_REGISTRY # Log in to GitLab's registry
    - docker build -t "$CI_REGISTRY_IMAGE:$CI_COMMIT_REF_NAME" . # Build Docker image
    - docker push "$CI_REGISTRY_IMAGE:$CI_COMMIT_REF_NAME" # Push image to GitLab registry
  only:
    - main # Push image only on the `main` branch or change this as per your needs
  when: on_success
As you can see, each platform has different syntax and structure, not to mention other details like system integration. This example represents a very basic pipeline. Now, imagine migrating 3,000 pipelines, each with an average of 1,000 lines of script. Yes, I’ve been there, and it’s a pain in the a**!
This introduction may seem long, but please bear with me—it’s my first time writing a technical blog. 😊
III. Problems To Solve
From the introduction we can list out the problems that are really common for CI systems:
- Inconsistent between environment (Local/Other Environments)
- Hard to maintain when the system grows and has bad engineers doing nonsense spaghetti code
- Almost impossible to change to other CI platform when the system grew to a certain level
IV. Solution
So this blog I will present a term for you which will address the problems above with CI AGNOSTIC.
1. What is CI Agnostic?
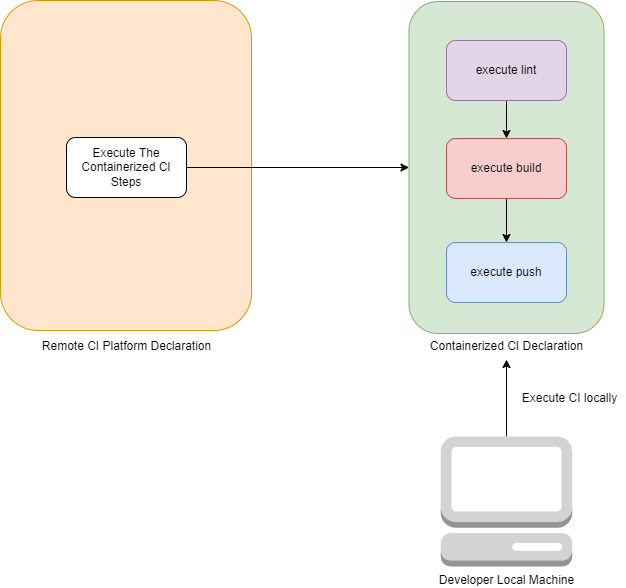
CI agnosticism embraces containerization, shifting CI declarations from platform-specific configurations to isolated and standalone containerized environments.
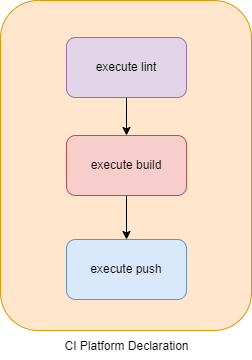
With the old traditional way: 
We will declare CI in the CI Platform specific language (e.g: .gitlab-ci.yml, buildspec.yml, Jenkinsfile, …)
Agnostic way: 
We will declare CI in containerized environment. And both local machine and Remote CI platform can just execute this same containerized environment.
This approach solves environment inconsistency since everything runs within isolated container environments other than CI platform specific configuration. Now developers can run CI locally, knowing it will work the same way in other environments. This reduces errors, speeds up feedback, and shortens delivery time.
Additionally, moving CI processes between platforms becomes easier, which is why it’s called CI Agnostic.
You can achieve this just by using native Dockerfile (Put all CI execution in the Dockerfile). However, this is has some limitation especially with performance/caching and action separation. Fortunately, there are several tools available to help.
2. Available Tools And Technologies
All of the tools I listed here are opensource :D btw.
| Name | Complexity | Declaration Language | Community Support | Personal Opinion |
|---|---|---|---|---|
| Dagger.io | Medium | Go/TS/Python | Good | It’s good but not easy to get on and required a skilled team |
| Earthly.dev | Low - Medium | Earthly syntax (Similar to Dockerfile) | Good | It’s good, easier to catch on compare to Dagger |
| Batect | Easy | Yaml | Not Maintained | I like the idea and the way this was implemented really similar to taskfile.dev and the simplicity of it. Anyone can understand without having much knowledge |
| Dockerfile | Easy | Dockerfile format | Good | This can work just fine but you may run into a few issues e.g performance and caching as well as action separation |
I would recommend Dagger.io or Earthly since they have more support from the community and more functionalities/features.
3. How Do They Work?
Both Dagger.io and Earthly use Buildkit behind the scence and having the same approach and only just slightly different in the configuration way:
- Dagger.io uses Go/TS/Python to declare the steps/functions
- Earthly uses its own declarative way which is really easy to catch on (They said Earthly is like makefile and Dockerfile have a baby - And I think it’s true)
Both of them will be able to execute all the executions in docker containers. And they can utilize buildkit for better utilize caching and performance. For the context of the blog, explaining buildkit will be beyond the scope. So just don’t care about it right now :D. I may create another blog just for that topic
3. Demo example
The demo I gonna use today is from my another repo that I’m working on to write a K8s Controller for cloud role integration. K8s Controller Pod Cloud Role Identity
- Prerequisites:
- Earthly (latest)
- Clone the repository
git clone https://github.com/craftaholic/k8s-pod-identity-controller.git
- You will notice that in the repository, there is already an Earthfile so you don’t have to do anything. Here is the content of the Earthfile:
VERSION 0.8
FROM golang:latest
LABEL maintainer="Tommy Tran Duc Thang <[email protected]>"
WORKDIR /app
COPY go.mod go.sum ./
RUN go mod download
COPY ./*.go ./
COPY ./pkg ./pkg

ci:
    FROM alpine:latest
    ARG IMAGE_NAME='k8s-pod-identity-controller'
    ARG TAG='latest'
    RUN echo "Starting CI..."
    BUILD +lint
    BUILD +test
    BUILD --pass-args +build

lint:
    FROM golangci/golangci-lint:latest
    RUN echo "Starting Linting..."
    COPY ./*.go ./
    COPY ./pkg ./pkg
    CMD ["golangci-lint", "run", "-v"]

test:
    RUN echo "Starting Testing..."
    RUN go test ./...

build:
    RUN echo "Starting Building..."
    ARG IMAGE_NAME
    ARG TAG
    RUN go build -o main .
    EXPOSE 8080
    CMD ["./main"]
    SAVE IMAGE $IMAGE_NAME:$TAG
Note: You also can notice there is no Dockerfile because Earthfile already replaced the need for it
In the file above there will be a few key points:
- The first block of the file looks like a Dockerfile -> That is the base Dockerfile.
- Command declarations: ci, lint, test, build.
- The ci command can refer to other command by using
Build +<command_ref>. - Command doesn’t have
FROMdirective then it will use the base default Dockerfile. - To execute any of the commands you can run
earthly +<command_name>
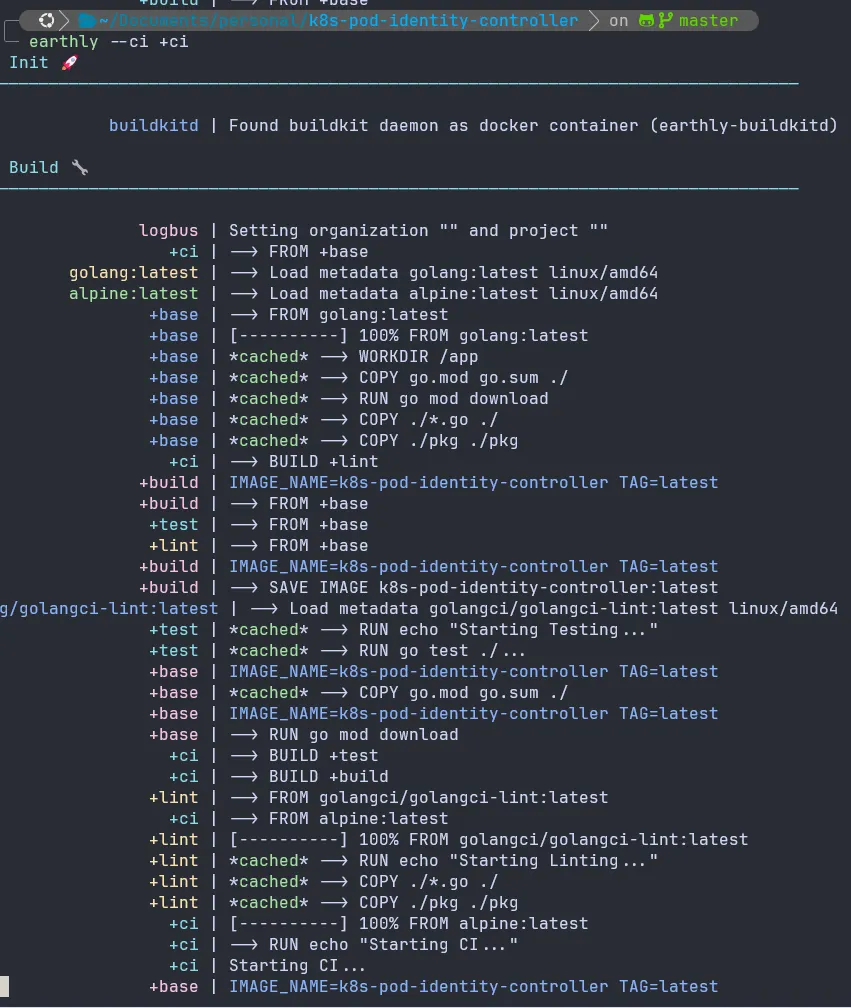
- To run the CI in local:
earthly --ci +ci
Note: The first time will longer but from the second time, it would be a lot more faster
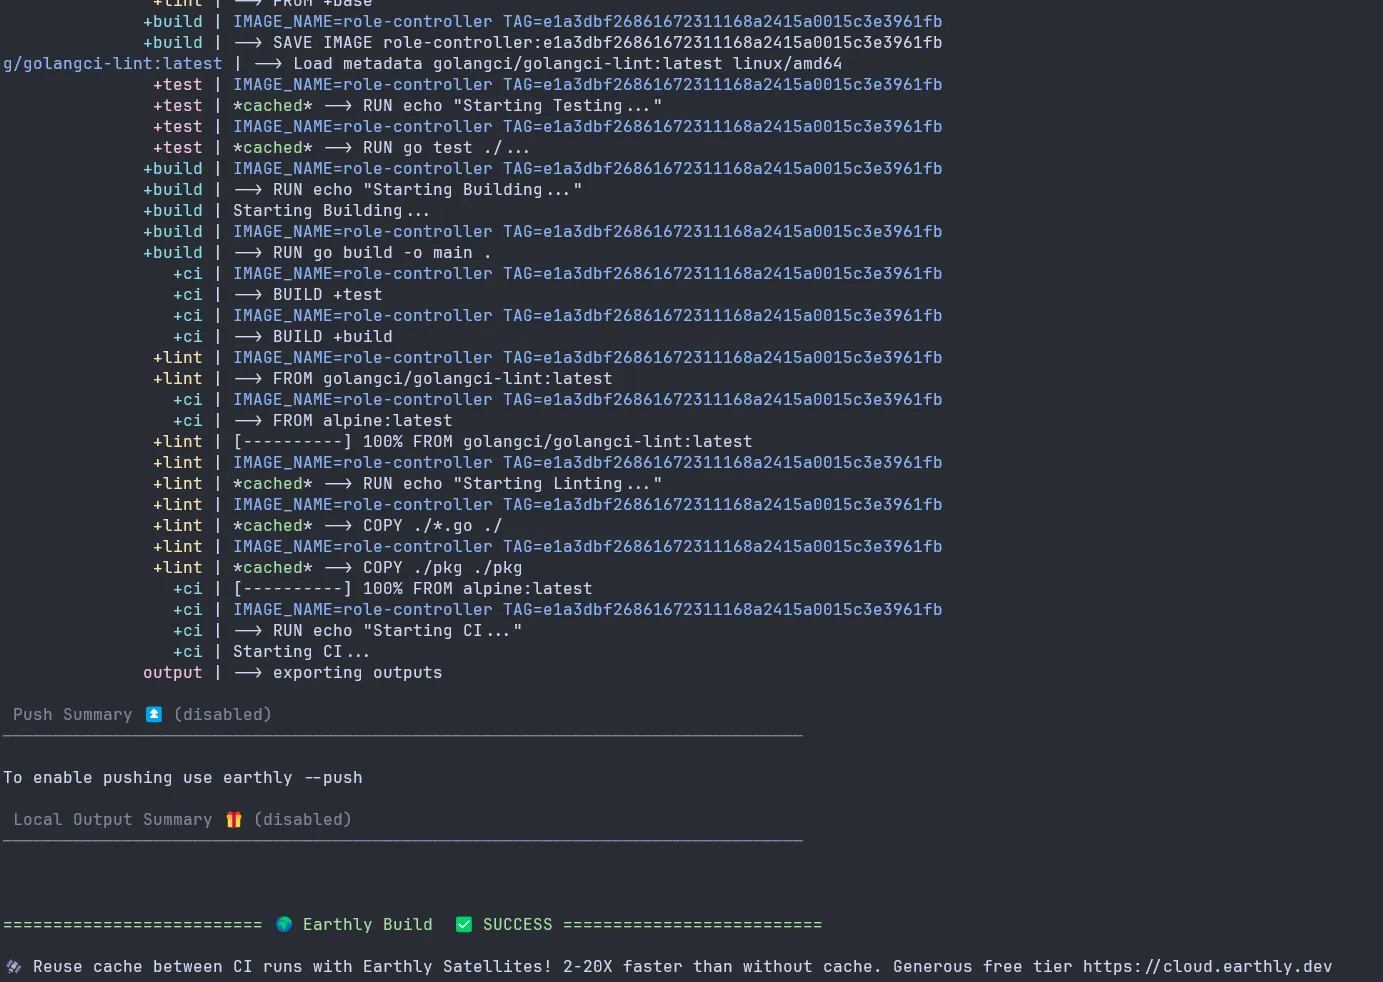
The output should looks like this:


- To integrate it with Remote CI Platform In this example I will show a sample .gitlab-ci.yml file
stages:
  - build

.earthly:
  image: earthly/earthly
  variables:
  before_script:
    - apk add --no-cache curl
    - earthly bootstrap

build:
  stage: build
  variables:
    FORCE_COLOR: 1
    EARTHLY_EXEC_CMD: "/bin/sh"
  services:
    - name: docker:24.0.5-dind
  extends: [.earthly]
  script:
    - earthly --ci +ci
As you can see the step needed to be declare on the CI Platform now really simple. Mostly just need to run earthly cli to run. And the output will be the same as you running from local or any other machine.
And that also the same case for other CI platform integration as well. You just need to execute earthly cli from the platform. Which make everything more consistence, portable, and easy to maintain.
V. Conclusion:
Thank you for reading my blog to the end. It’s a bit long and covers a challenging topic, but it’s an exciting one with practical applications. If you’d like to suggest improvements, please feel free to click Suggest Changes at the top of this blog. Many thanks, and I’ll see you in future posts on other cool topics!